Demo Driver
This sample shows how to create a device driver using the MIP Driver Framework. The sample includes all supported device types - i.e., cameras, microphones, speakers, inputs, outputs, and metadata.
Before the 2021 R1 release, MIP Driver Framework-based device drivers supported only one video channel per hardware.
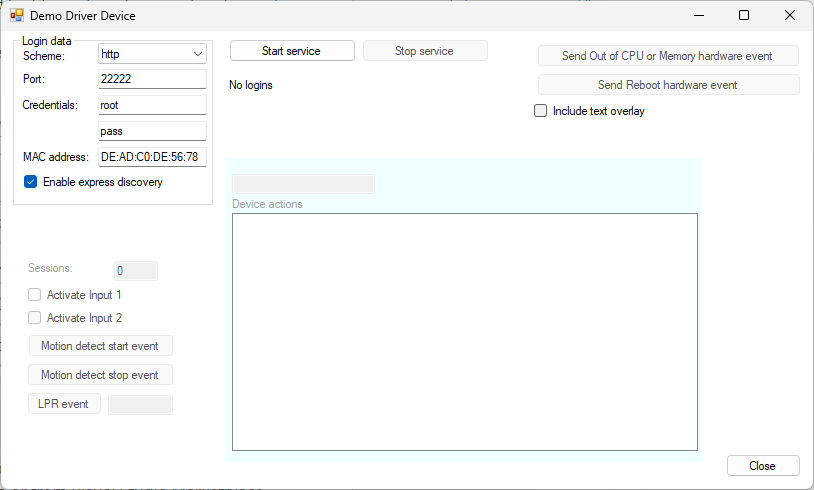
The sample does not communicate with a real device, but comes with an application, Demo Driver Device, that acts like a device:

Note, that Demo Driver Device is using screen capturing and that operation is known for high CPU usage. It means that the actual FPS on the device depends on how much CPU is available on the machine where it is running, and the higher FPS is set, the more CPU is needed. If there is not enough CPU available, the actual FPS can be significantly lower than the value set in the camera settings.
The sample demonstrates
- Implementing a device driver using the MIP Driver Framework
Using
- VideoOS.Platform.DriverFramework
Environment
- MIP Driver Framework
Visual Studio C# project
To build the Demo Driver, open and build this project:
Deploying
To deploy the Demo Driver:
- Stop the Recording Server Service
- From project build output, copy the files
DemoDriver.defandDemoDriver.dll(andDemoDriver.pdbif debugging) to%ProgramFiles%\Milestone\MIPDrivers\DemoDriver\. - Start the Recording Server Service
Running
To try out the Demo Driver sample:
- If you have just deployed the Demo Driver, restart the Recording Server Service to make the driver available.
- Run
mipsdk-samples-plugin\Simulators\DemoDriverDevice\bin\debug\DemoDriverDevice.exeas administrator.
- By default, the device will use the credentials
root:pass, the scheme ‘http’, the port22222, and the MAC addressDE:AD:C0:DE:56:78. Specify the desired port, MAC address, and credentials, and then select the Start service button. - In the Management Client, use the Add Hardware... wizard with the Manual method to add the Demo Driver device to your recording server. The Demo Driver is found in the driver list in the Other group.
- A Demo Driver device will now be added to your recording server.
- You can add more Demo Driver devices by starting multiple
DemoDriverDeviceapplications running on different ports and MAC addresses. Be aware that only one of them can have express device discovery enabled. - The demo driver also supports a custom driver command named
"DemoCommand". To try this, you will need to make a plug-in or
application sending a
Server.DriverCommandmessage.
To use the https scheme you need to have a certificate
available in your personal certificate repository on the machine where
the DemoDriverDevice.exe is running and then execute the following
command in a command prompt run with administrative privileges:
netsh http add sslcert ipport=0.0.0.0:<PORT> appid={<APPID>} certhash=<CERTHASH><PORT> should be replaced with the port chosen in
the application, <APPID> is any guid
(e.g. F86EEB0F-4FDB-4C67-A6D6-C9E910C10E66 - it does not
need to correspond to anything) and <CERTHASH> is the
thumbprint of the certificate. The latter can be found in the ‘Manage
Computer Certificates’ control panel, if you navigate to the installed
certificate, double-click it and then you will find the thumbprint in
the ‘Thumbprint’ field on the ‘Details’ tab.
Troubleshooting
If the "Demo Driver" does not appear in the driver list for manual setup in Management Client, make sure the user which is running "Recording Server" has access to the "MIPDrivers" folder.
From XProtect 2023 R1 MIP driver framework drivers are included in the express hardware scan process and the DemoDriverDevice has thus been updated. This will, however, mean that it might also be detected by the ONVIF device driver on previous versions of XProtect, but as it is not ONVIF compliant it will not work with the ONVIF device driver.